Thursday, October 15, 2020

Salmon with Miso Rice


Once again we purchased Salmon from Black Hogg. It is great Salmon. We love this Salmon. The recipe for Roasted Salmon With Miso Rice and Ginger-Scallion Vinaigrette was excellent. We would make this again.


Roasted Salmon With Miso Rice and Ginger-Scallion Vinaigrette

New York Times


This simple weeknight meal makes great use of pantry staples to create complex flavors with minimal work. Miso is often used to flavor soups or sauces, and here, it is added to raw rice before cooking, which results in a delightfully sticky, savory steamed rice. Fragrant and nutty basmati is called for, but any long-grain rice will work. Shredded cabbage brings freshness and crunch to the finished dish, but use whatever crispy vegetable you have on hand: shredded brussels sprouts, carrots, snap peas, radishes and iceberg lettuce are all great options. For a heftier meal, add some canned chickpeas, white beans or black beans. To finish, the vibrant tang of the bright ginger-scallion vinaigrette balances the richness of the roasted salmon.


Ingredients


¼        cup white or sweet miso

1-½    cups basmati or other long-grain rice

4         (6-ounce) skin-on salmon fillets

2         tablespoons extra-virgin olive oil

Kosher salt and black pepper

¼        cup low-sodium soy sauce

¼        cup chopped scallions, plus more for garnish

1         tablespoon distilled white vinegar or unseasoned rice vinegar

1         tablespoon minced fresh ginger

4         cups finely shredded cabbage, such as green, Napa or savoy (about 8 ounces)

Roasted sesame oil, for serving


Preparation


1. Heat oven to 425 degrees. In a medium saucepan, whisk miso with 2 1/4 cups water until dissolved. Stir in rice and bring to a boil. Cover, reduce heat to low and cook until all of the liquid is absorbed and rice is tender, about 15 minutes. Remove from heat and let stand for 5 minutes. Fluff rice with a fork (it will be a little sticky).

2. On a rimmed baking sheet, rub salmon all over with olive oil, season with salt and pepper and arrange skin-side up. Roast until fish is just opaque and cooked to medium, 8 to 10 minutes.

3. In a small bowl, combine soy sauce, scallions, vinegar and ginger, and season with salt and pepper.

4. Divide miso rice and cabbage among bowls. Top with salmon, ginger-scallion vinaigrette and sesame oil.

Tuesday, October 13, 2020

Spicy Chili Crisp Chicken


I discovered Chili Crisp this pandemic year. I like the taste. The brand I buy is Fly by Jing. I recommend it! Here is a recipe for Spicy Chili Crisp Chicken Thighs using it.


Spicy Chili Crisp Chicken Thighs

@kitchn


Chicken thighs are a staple of my weeknight cooking routine: They’re inexpensive, quick-cooking, and delightfully juicy. Still, I’m always on the hunt for flavor boosters that will elevate the protein without a lot of work. Chili crisp does exactly that. 

Chili crisp has soared in popularity in the U.S. in the last few years, but it’s been a staple condiment in China for decades. Although it varies by brand and by recipe, most chili crisps are made with chiles, fried garlic, fried onion, and warming spices like cinnamon or star anise, making for a spicy chili oil that’s uniquely crunchy. You can find jars of it online or at big grocery chains, but I highly recommend grabbing a jar at your local Asian market — they’ll have the best selection.

Here, the spicy, crunchy condiment is mixed with olive oil, honey, and apple cider vinegar to create a spicy-sweet, intensely flavorful sauce for the roasted chicken thighs. You’ll brush it on after they’ve roasted for 25 minutes, which gives the skin a jump-start on crispness and a golden color. Out of the oven, give the thighs a few minutes to cool off (the skin and sauce will continue to crisp as they do), then serve over rice with lots of cilantro or scallions, and extra spoonfuls of chili crisp.


Ingredients


¼           cup Chili Crisp

¼           cup plus 2 tablespoons olive oil, divided 

¼           cup honey

2             tablespoons apple cider vinegar

1             medium red onion

2             large broccoli crowns (about 1 1/2 pounds total)

1-1/2      teaspoons kosher salt, divided

2             pounds bone-in, skin-on chicken thighs (4 to 6)

Sliced scallions or chopped fresh cilantro, for serving (optional)

Cooked rice, for serving (optional)


Instructions


1.   Arrange a rack in the middle of the oven and heat the oven to 425°F. Line a rimmed baking sheet with parchment paper.

2.   Place 1/4 cup Garlic Chili Crisp, 1/4 cup of the olive oil, 1/4 cup honey, and 2 tablespoons apple cider vinegar in a small bowl and whisk to combine.

3.   Halve and peel 1 medium red onion. Cut into 1/4-inch thick slices through the root end. Cut 2 large broccoli crowns into 1-inch florets. Place the onion and broccoli on the baking sheet. Drizzle with the remaining 2 tablespoons olive oil and season with 1/2 teaspoon of the kosher salt, toss to combine, and spread into an even layer.

4.   Debone 2 pounds bone-in, skin-on chicken thighs: Arrange each chicken thigh so it is skin-side down. Using kitchen shears, cut through the meat along both sides of the center bone, making sure not to cut all the way through the meat and skin. Cut off the cartilage at the top and bottom of the bone. Cut underneath the bone, which will cut the bone off completely from the thigh. Use the shears to trim off any excess fat, cartilage, or skin.

5.   Season the chicken with the remaining 1 teaspoon kosher salt. Place the chicken on the vegetables skin-side up. Roast until the chicken skin is golden and crisp, about 25 minutes.

6.   Baste the chicken pieces with about 2/3 of the sauce. Roast until the chicken is cooked through and the vegetables are caramelized, about 10 minutes more. Sprinkle with sliced scallions or chopped cilantro if desired. Serve with rice and more sauce if desired.


Recipe Notes


Deboning chicken thighs: Deboning chicken thighs is the best way to get deliciously crisp chicken that you can cut into with a fork. Feel free to start with skin-on, boneless thighs if you can find them, or use bone-in thighs and roast them for an additional 5 minutes in the oven.


Monday, October 12, 2020

Stir Fried Pork with Green beans


We started with a Pear Salad and then made a house favorite: Stir-Fried Green Beans With Pork and Chiles. This is an excellent variation on a Chinese Stir Fry. We often make it. Give it a try if you haven't made it. You can find the recipe on our blog of: November 9, 2018. Click the date to get the recipe.
 

Thursday, October 08, 2020

Shu Mai Burgers and Garlic Unami Noodles


This is one of my favorite dinners. Shu Mai Burgers are great! Not exactly like Shu Mai that one would get at a Chinese  Restaurant, but a great American nock off. You can get the recipe for the Shu Mai Burgers on our blog of: June 30, 2010. Click the date to get the recipe.

The Unami Garlic Noodles are super tasty. You can get the recipe for the Noodles on our blog of: January 25, 2020, Scott dropped off the pickles for us. I love them. We depend upon the kindness of our Chinese friends to shop for the pickles! All together it is a perfect dinner!


Sunday, October 04, 2020

Tomato Risotto


This is a great recipe! I loved it! The risotto is very rich. Make this. With the Risotto I made Focaccia Bread. I purchased the dough from Cookbook. It is great, we top it with Parmesan Cheese, Thyme and Salt.


Tomato Risotto

New York Times


Once you master the risotto technique, you can make flavorful versions throughout the year. This summery version is based on red, ripe tomatoes from the garden, but if you want to up the tomato quotient, surround the finished dish with slices of multicolored heirloom varieties. Best as a first course or vegetarian main course, it could also pair with a main course — grilled fish, for instance.


Ingredients


Extra-virgin olive oil

1       large onion, diced (about 1 1/2 cups)

Salt and pepper

1-½  cups arborio or carnaroli rice

Pinch of red-pepper flakes

2       garlic cloves

½      cup white wine

2       cups diced ripe red tomatoes

3       cups boiling water or vegetable broth

½      cup grated pecorino or Parmesan, plus more for serving

4       medium tomatoes, in different colors, sliced

Chopped parsley, for garnish

Snipped basil, for garnish


Preparation


1.   Put 3 tablespoons olive oil in a heavy-bottomed saucepan over medium-high heat, then add the onion, and season generously with salt. Add pepper to taste, and cook until softened, about 5 minutes.

2.   Add the rice and cook the onions, stirring, until the onions are barely brown, about 2 minutes. Add red-pepper flakes, garlic, white wine and diced tomatoes, and cook until most of the liquid has evaporated, about 5 minutes more.

3.   Add 2 cups boiling water and adjust the heat to a brisk simmer. Cook for 5 to 6 minutes, stirring well with a wooden spoon every minute or so.

4.   When the liquid is absorbed, add remaining 1 cup water and continue to cook for another 5 minutes, until the rice is cooked, but the grains are still firm. Taste and adjust the seasoning, adding another splash of water if necessary to loosen the mixture. Turn off the heat, stir in the pecorino and 2 more tablespoons olive oil.

5.   Transfer to a low, wide serving bowl. Surround the rice with tomato slices and season them with salt and pepper. Sprinkle with parsley and basil. Pass more grated cheese at the table.


Friday, October 02, 2020

Galbee Chicken


Our local neighborhood restaurant, Black Hogg is closed to dining in due to the Pandemic. Rather than have take home food they are selling great meats and fish with a sauce to cook at home. Most of the sauces have a Korean flavor profile. We purchased Chicken and prepared according to their recipe for Galbee Chicken. It was good. I love the flavorful crispy skin!


Galbee Chicken - All-Natural Chicken

Black Hog 


This chicken cooks best on the grill


1.            Oil grill grates and get grill hot.

2.            Place onto grill. Flip chicken every 1-2 minutes. Move to cooler parts of grill to avoid flare-ups.

3.            Cook for around 5-7 minutes total, until chicken feels firm to touch.

4.            You want crispy skin and the edges to have some char. Internal temp should be around 160-170 degrees.

Thursday, October 01, 2020

Fennel Rubbed Pork Chops


I love Pork Chops. We purchased double cut Pork Chops from Snake River Farms. They were beautiful. This recipe for Fennel Rubbed Pork Chops is excellent. You can find the recipe on our blog of: September 10, 2018. Click the date to get the recipe. It is a great way to prepare the Chops.

Wednesday, September 30, 2020

Salmon Burgers with Sushi Rice


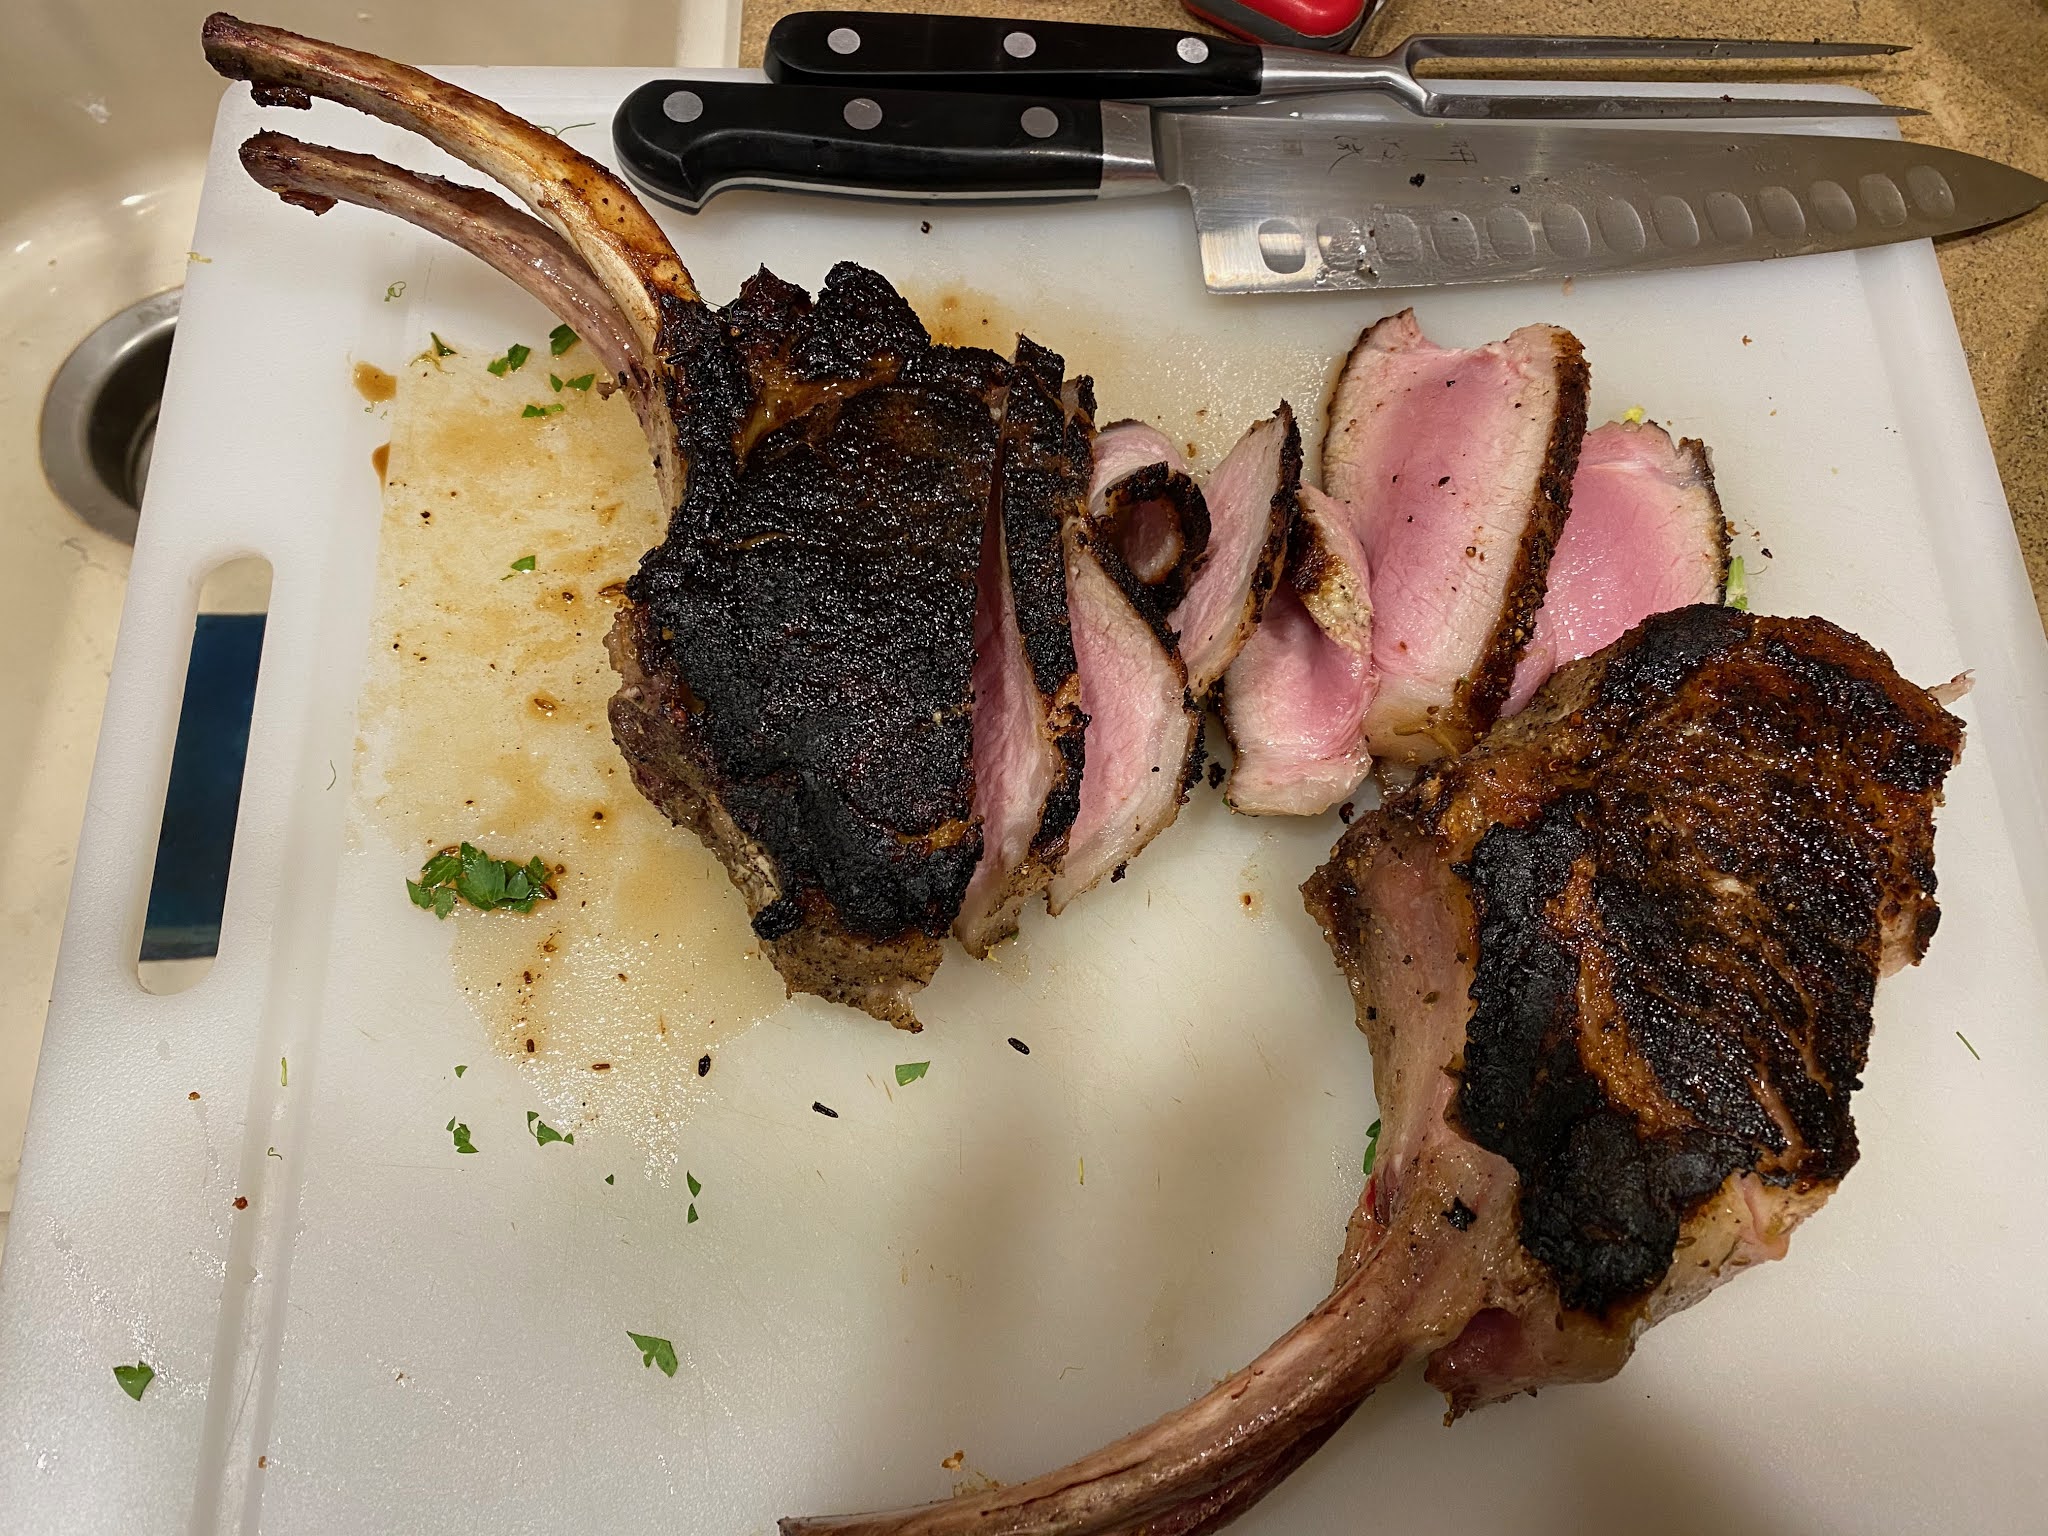
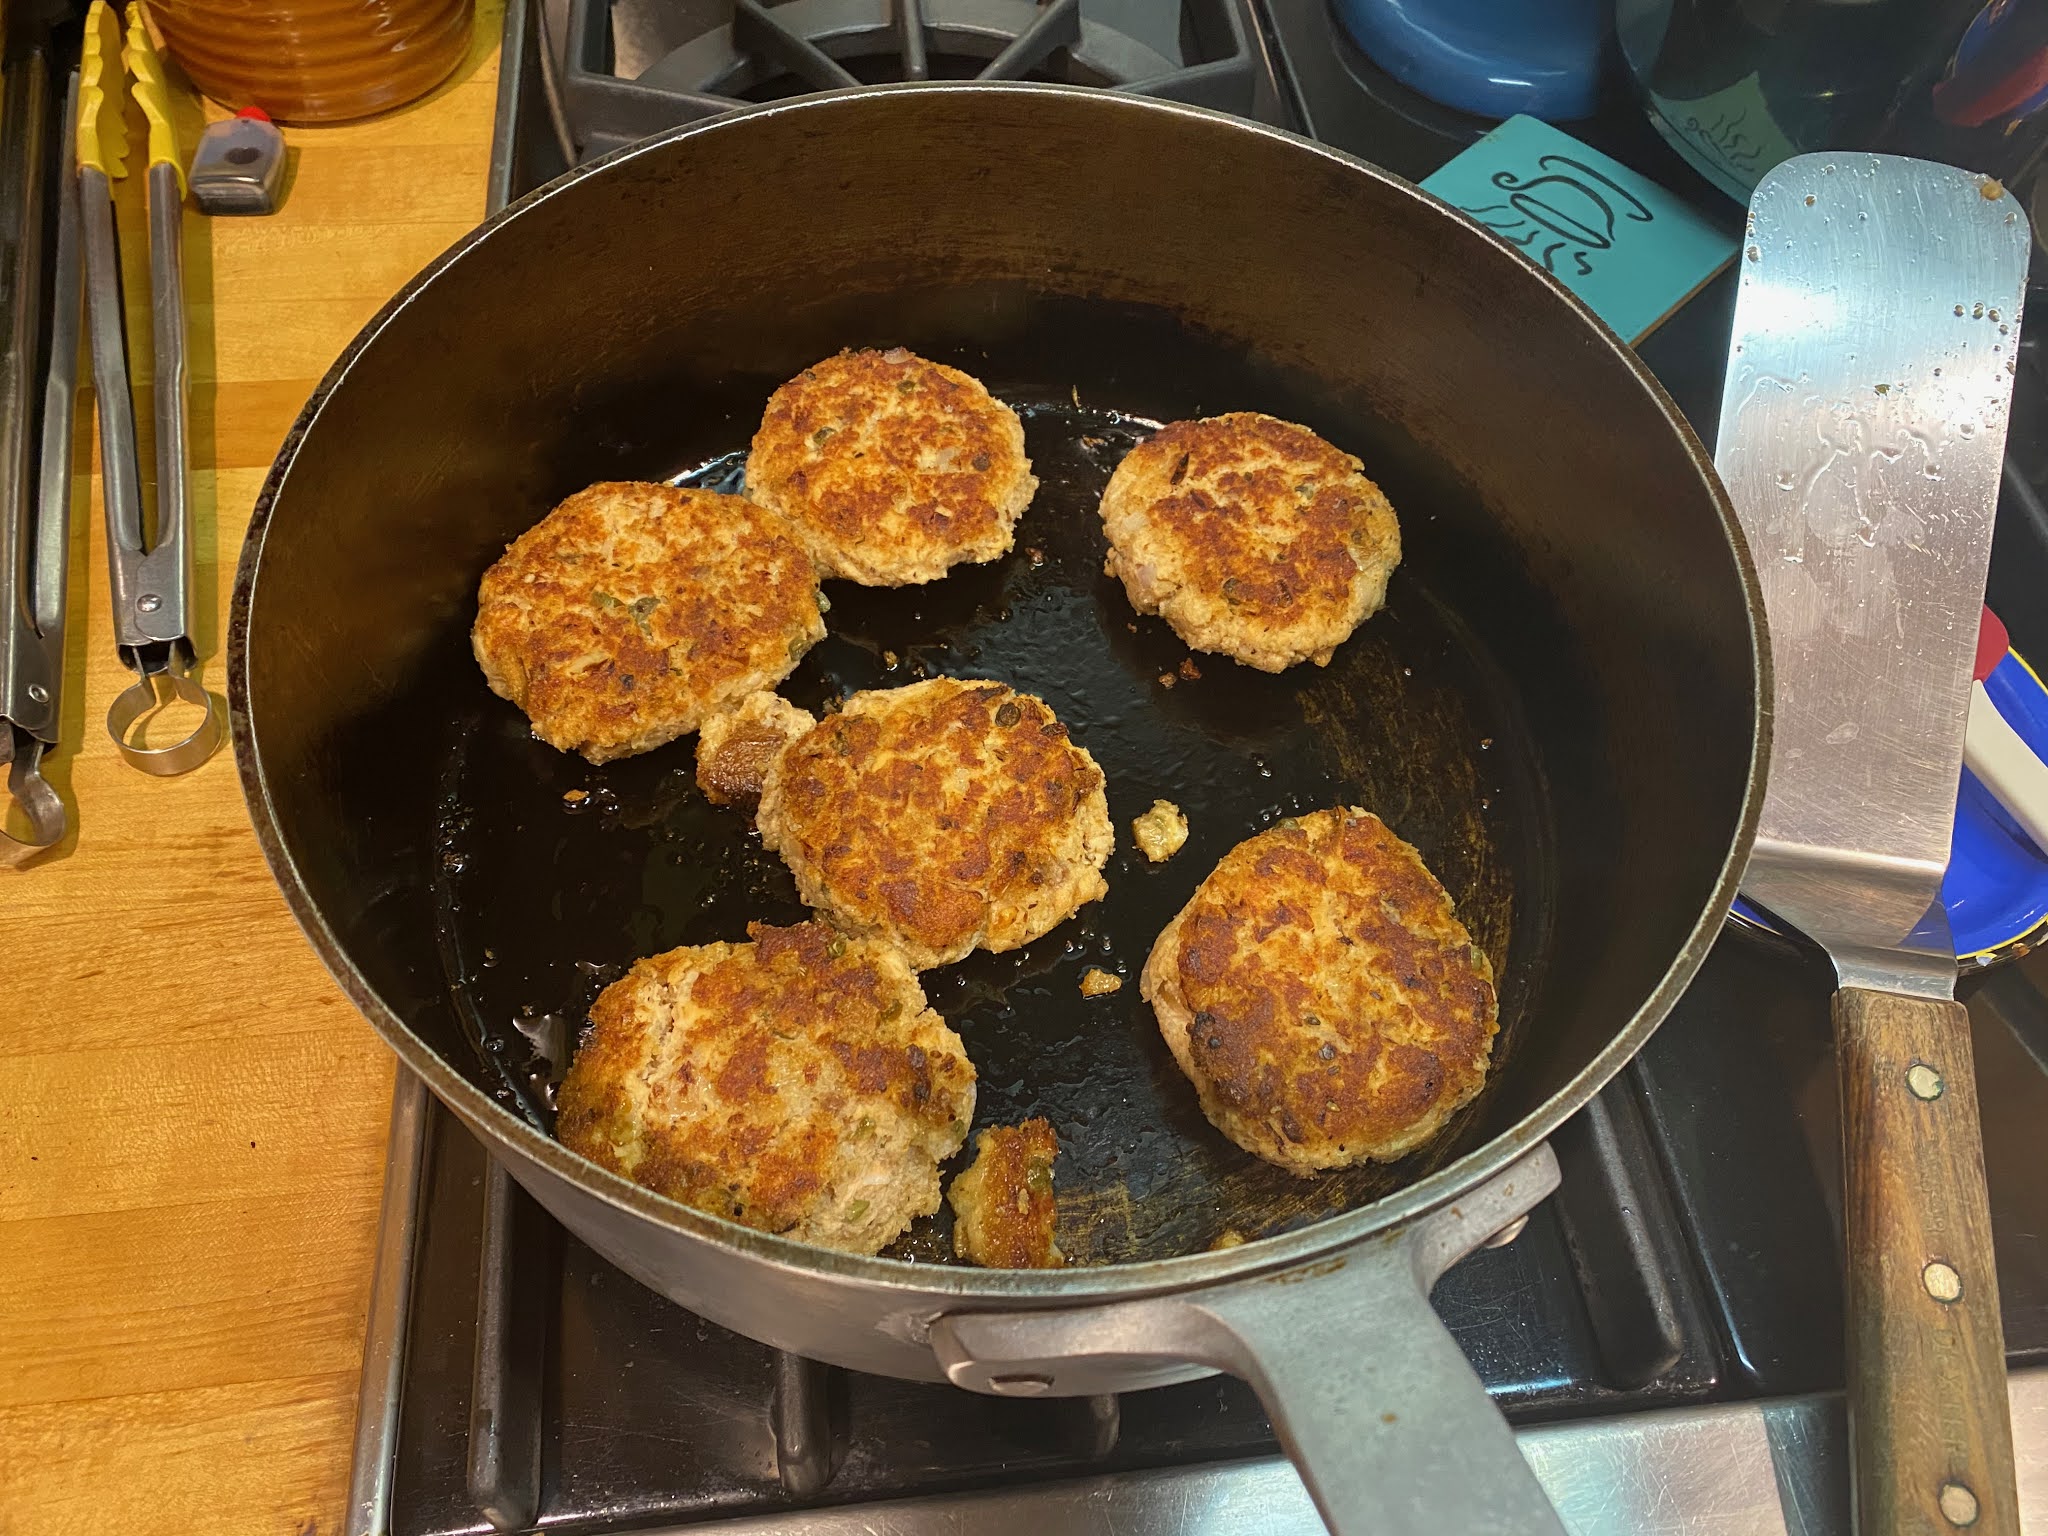
With our left over Salmon we made Salmon Burgers and served it with Sushi Rice. It was a great Japanese inspired dinner. The reason we made the seasoned rice is we were trying to replicate the Sushi Rice served with takeout from Majordomo. It is fantastically flavorful. We were close in the flavor of the rice.

Salmon Burgers

The New York Times

For this recipe, you’ll want to grind part of the salmon in a food processor: It’ll bind the rest, which can be coarsely chopped to retain moisture during cooking. Some bread crumbs keep the burger from becoming as densely packed as (bad) meatloaf. This approach, along with a few simple seasonings, produces delicious burgers in not much more time than it takes to make one from ground chuck. The only real trick is to avoid overcooking. Whether you sauté, broil or grill this burger, it's best when the center remains the color of … salmon. Two or three minutes a side usually does the trick.


Ingredients

1-½  pounds skinless, boneless salmon

2       teaspoons Dijon mustard

2       shallots, peeled and cut into chunks

½      cup coarse bread crumbs

1       tablespoon capers, drained

Salt and black pepper

2       tablespoons butter or olive oil

Lemon wedges

Tabasco sauce

Preparation


1.    Cut the salmon into large chunks, and put about a quarter of it into the container of a food processor, along with the mustard. Turn the machine on, and let it run — stopping to scrape down the sides if necessary — until the mixture becomes pasty.

2.    Add the shallots and the remaining salmon, and pulse the machine on and off until the fish is chopped and well combined with the puree. No piece should be larger than a 1/4 inch or so; be careful not make the mixture too fine.

3.    Scrape the mixture into a bowl, and by hand, stir in the bread crumbs, capers and some salt and pepper. Shape into four burgers. (You can cover and refrigerate the burgers for a few hours at this point.)

4.    Place the butter or oil in a 12-inch nonstick skillet, and turn the heat to medium-high. When the butter foam subsides or the oil is hot, cook the burgers for 2 to 3 minutes a side, turning once. Alternatively, you can grill them: Let them firm up on the first side, grilling about 4 minutes, before turning over and finishing for just another minute or two. To check for doneness, make a small cut and peek inside. Be careful not to overcook. Serve on a bed of greens or on buns or by themselves, with lemon wedges and Tabasco or any dressing you like.

Vinegar Sushi Rice

Washoku Cookbook


Vinegar-seasoned rice is essential to all sushi recipes. Su meshi (literally, “tart rice") is the word used most often to describe it. At the
sushi bar, though, you may hear rice being called shari, an esoteric
reference to the bones of Buddha that reflects the elevated status
afforded rice in Japanese society.


This recipe can be used to make any sushi dish. The quantity given here is enough to make about four portions.


You can halve or double the recipe for the seasoned vinegar
(sushi su or awase-zuj. It will keep for 1 month in the refrigerator.


Makes 4 Cups Cooked Rice

| r- ,

Seasoned Vinegar

2/3    cup rice vinegar

2       tablespoons sugar

1       teaspoon salt

1       piece kombu, 1 inch square (optional)

4       cups warm, freshly prepared Cooked White Rice
1       Tbl Mirin as MSG substitute (Cathy idea)


To make the seasoned vinegar, combine the vinegar, sugar,
salt, and kombu in a small saucepan. The kombu is optional,
but it will enhance the overall flavor. Place over medium-high
heat and warm, stirring, until the sugar and salt dissolve.

Transfer the warm rice to a handai or a wide, shallow bowl. Avoid an aluminum vessel, because it will retain heat and can give the rice a metallic taste. Using gentle cutting and folding motions, toss the rice with a rice paddle as you fan it with an uchiwa.


When clouds of steam are no longer rising from the rice,
but the rice is still warm, drizzle in some of the seasoned vine-
gar. Start with just a tablespoonful. Continue to use gentle tossing motions and to fan as you season the rice, steadily adding the remaining seasoned rice a few drops at a time. Taste occasionally to verify the seasoning.


It makes an excellent salad dressing when mixed with a few drops of sesame oil.


Cover the seasoned rice in the wooden tub or vessel you mixed in with plastic wrap until ready to use.


Monday, September 28, 2020

Reverse Seared Birthday Steak - New way to Grill


For Cathy's birthday we decided to have steak. We ordered a delivery from Snake River Farms. Included with the Steak was a recipe for Reverse Sear method of preparing a steak. We had never tried cooking a Steak like this. You can see from the picture it turned out great!

Who would think we could still learn another way to cook a steak.

We used the reverse-sear technique because it eliminates some of the guesswork that comes with other cooking methods. “Instead of searing and cooking, you get it to temperature and just sear it to finish.”


To start, you’ll want to put a wire grate in a decent-sized pan and then load your steak into it — after seasoning of course. 

“Season the hell out of that thing”. “I’m a salt and pepper guy. I’ve also heard people talk about don’t put pepper on it because it gets bitter. Use a grainier salt. Table salt’s also fine. Just buy a box of kosher salt, it’s inexpensive.”

Once that’s done, it’s time to head for the oven.


“The idea is to slow roast the Steak. You can do it as low as like 200 or 225 degrees, but I find that tries my patience,” Yasuda says. “Two-hundred or 275 is probably better and it doesn’t overcook it, but you’re going to let that thing slow roast, especially with a big steak. We’re going to have to get that steak’s internal temperature up to 128. For a thick steak, it’s going to probably be an hour or maybe a little less.”


For best results when checking the steak’s temperature, Yasuda suggests using a digital thermometer.

“I always start checking, no matter what, at like at half an hour, just to be sure,” Yasuda says. “Then, when it gets to the 128, degrees you pull it out. It’s kind of nice because at that point it can kind of just hang out. If I was having people coming over and they were late, I’m not going to sweat it at all. It’s not critical to let the steak rest at that stage. When it’s time to reverse it, get your carbon steel or my cast-iron pan prepped with grapeseed oil and crank things as high as they’ll go. Then, you sear it on both sides for 60-90 seconds. This time it’s nice because you don’t want to do it too much because you’ll see it start cooking inside if you leave it on there too long. After searing, it has that crust. Like when you slice that with your knife, it takes a minute to bite through and then it goes … I’m kind of salivating thinking about it.”


After cleaning up your drool, there’s just one more thing to do.

“Pull it out of the skillet, put it on your cutting board and let it rest for 10 minutes. That resting is huge,” Yasuda says. “If you cut a steak rare like that, the juice just flows out like crazy. Let it rest, and juice aside, it’s going to continue cooking. I think resting is the secret sauce, as long as it’s the right temperature. You don’t want to eat anything when it’s super hot because you don’t really taste it. Resting allows the meat to firm up and the juices to come back in. Steak is pretty simple. Don’t mess with it too much.”


Saturday, September 26, 2020

Salmon with Liquid Gold


Our local neighborhood restaurant, Black Hogg is closed to dining in due to the Pandemic. Rather than have take home food they are selling great meats and fish with a sauce to cook at home. Most of the sauces have a Korean flavor profile. We purchased Salmon that was from the Faroe Islands. I was unaware of even the existence of the Faroe Islands, let alone that they produce some of the best Salmon in the world. Live and learn. The Salmon was exceptional. The Sauce that they provided was based on Garlic. We loved especially over the accompanying Orange Butter Rice that we made. It was cleverly named: Liquid GoldIt is a great variation of Rice. You can find a recipe on our blog of: May 23, 2019. Click the date to get the recipe.

Buttery Garlicky Oven-Roasted Salmon 


Preheat Oven: 425 (convection), 450 (standard)


1.     Place salmon, skin-side-down, on a foil-lined baking sheet (sprayed with oil).

2.    Roast in oven for 10-12 minutes (depending on thickness of piece).  Larger pieces may require a little longer cooking time.  Small pieces may require less than 10 min.

3.    Make sure not to overcook, you want the center to be rare and pink (125-130 degree internal temp).

4.    Melt "Liquid Gold" in a small saucepan.  Do not boil, you just want to warm it up.

5.    Plate the fish and spoon the sauce on top.  Enjoy!


*while most pin-bones have been removed, be careful of any that may have been missed.


Tuesday, September 22, 2020

Veal Pasta


We decided to make one of our very favorite pastas. It has a French name: Tendrons de Veau Le Cameleon, but is really like an Italian Pasta with Veal Sauce.

You can use many different cuts of veal, but we use Veal Shanks. It is braised on top of the stove. When done, all of the meat falls off of the bone and we scoop out the marrow and add it to the sauce. It is VERY rich and delicious. The recipe is in a wonderful cookbook: Bistro Cooking by Patricia Wells. You can get the recipe in our blog of: January 6, 2009. Click the date to get the recipe.

Monday, September 21, 2020

Cod Cakes


We had left over Cod Fish and decided to make Cod Cakes. We used a great recipe for Cod Cakes In Tomato Sauce. Cathy modified the recipe by adding Corn, the Horseradish Sauce from the previous night, Bread Crumbs and Flour. It was excellent, crispy and tasty! You can get the recipe from our blog of: April 26, 2013. Click the date to get the recipe.

Sunday, September 20, 2020

Cod Fish with Potatoes and Horseradish-Taragon Sauce


We made this recipe of Salmon with Potatoes and Horseradish-Tarragon Sauce. The title gives you all you need to know. How could it not possibly be great! However we modified the recipe using Cod rather than Salmon. The Cod was  excellent.

Salmon with Potatoes and Horseradish-Tarragon Sauce


New York Times


Adapted from an 18th-century recipe by George Lang for his 1971 cookbook, “The Cuisine of Hungary,” this recipe layers roast potatoes with just-tender baked salmon and a fresh swipe of horseradish sauce. You could substitute the potatoes with carrots, beets or other root vegetables, or you could play around with more tender vegetables like zucchini or fennel, though you’d need to slice them more thickly and reduce the cook time in Step 1. Likewise, halibut, cod or another white fish can be used instead of salmon. The bright horseradish sauce keeps the salmon moist and gives this dish verve, pairing horseradish’s peppery punch with tangy sour cream and fresh herbs.


Ingredients


2       tablespoons unsalted butter

3       medium Yukon Gold potatoes (about 1 pound), unpeeled

Kosher salt and black pepper

½      cup chopped shallots

1       cup sour cream or Greek yogurt

⅓      cup drained prepared horseradish

3       tablespoons tarragon

3       tablespoons minced chives

⅛      teaspoon white pepper (optional)

2       pounds boneless, skinless salmon or halibut fillet

1       teaspoon hot paprika


PREPARATION


1.    Heat oven to 400 degrees and liberally grease a 9-by-13-inch glass baking dish with butter. Slice the potatoes paper-thin (less than 1/8-inch thick) and line the dish with the potatoes, slightly overlapping them as you arrange them in an even layer. Season generously with salt and pepper, dot with the shallots and bake until the potatoes are almost cooked through, about 20 minutes.

2.    Meanwhile, prepare the horseradish-tarragon sauce: Add the sour cream, prepared horseradish, 2 tablespoons each tarragon and chives, white pepper (if using) and 1 teaspoon salt to a medium bowl and stir to combine. Refrigerate. (This makes about 1 1/3 cups.)

3.    Sprinkle the salmon with the paprika and season with salt. Remove the dish from the oven and gently place the salmon on top of the potatoes. Brush 2 to 3 tablespoons of the horseradish-tarragon sauce over the salmon to coat, then bake until the fish flakes with a fork, 15 to 20 minutes, depending on the thickness of the fillet.


Wednesday, September 16, 2020

Bucatini All'Amatriciana


One of our favorite pastas is Bucatini All'Amatriciana. We often make it. You can get the recipe on our blog of: November 24, 2014. Click the date to get the recipe.

Friday, September 11, 2020

More Steak


We had Steak again. We also baked frozen cookies. Chocolate Chip Cookies are perfect for Pandemic times.

Thursday, September 10, 2020

Steak!


We have been eating a lot of Steak. It is a great comfort food. We served it with Potatoes and Arugula with Balsamic. You can find our basic method for Cooking Steak Indoors on our blog of: February 17, 2018. Click the date to get the recipe.


Tuesday, September 08, 2020

Cooking in a Pandemic Part 2

 3 months of cooking, Amazing what we were able to cook, during this pandemic!