Monday, January 30, 2023

Salmon and Daikon in Garlic Butter Miso Sauce


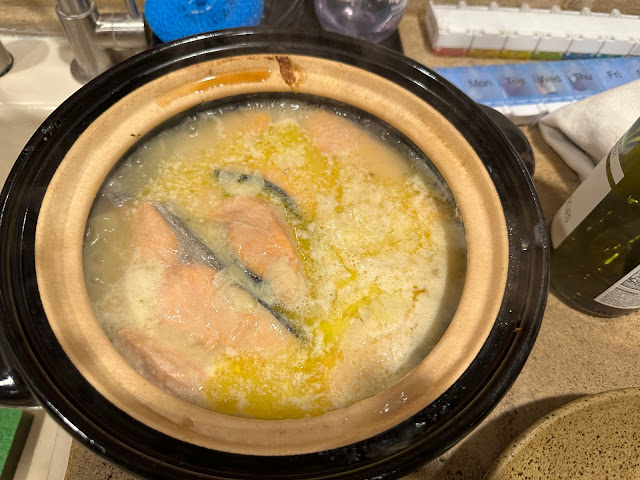
Salmon and Daikon in Garlic Butter Miso Sauce was another successful Asian inspired dish. We picked up beautiful Salmon at Gelson's. We actually got two nights dinner out of it!  We had to search a bit to find the Daikon. I expected the Daikon to be hard to cut, but it actually is a tender vegetable, making it easy to slice. Our neighbors Kevin and Lauren had given us a bottle of Sake that went perfectly with it.

Salmon and Daikon in Garlic Butter Miso Sauce

New York Times


A stunning one-pot meal that cooks in just 15 minutes, this salmon dish creates a silky miso sauce that tastes lavish. The recipe comes from Naoko Takei Moore, who co-authored “Donabe: Classic and Modern Japanese Clay Pot Cooking” with Kyle Connaughton (Ten Speed Press, 2015) and created Toiro, a Los Angeles shop that specializes in donabe and Japanese cookware. It’s intended to be cooked in a donabe, a Japanese clay pot prized for its ability to retain heat and cook evenly, but also works well in a Dutch oven or other pot. Once you’ve stirred together your miso sauce, seasoned your salmon and prepped your vegetables, the meal comes together with little effort, as you layer the vegetables, dashi, salmon and sauce in your pot then simmer until tender. Organize your prepped ingredients and the practice of cooking this dish feels as soul-soothing as the results.


INGREDIENTS

Yield: 4 servings


FOR THE MISO SAUCE


¼       cup miso

2        tablespoons sake

1        tablespoon mirin


FOR THE SALMON


1        teaspoon sea salt

1        pound salmon fillet, skin removed, cut into 6 to 8 pieces

½       pound daikon, halved lengthwise if thick, then cut crosswise into ⅛-inch-thick slices

1¼     cups dashi, preferably kombu and bonito dashi

1        (7-ounce) package enoki mushrooms, trimmed then torn into small clusters (about 5 ounces)

1        small carrot, peeled, cut into 2-inch segments then sliced into ⅛-inch-thick matchsticks

2        garlic cloves, thinly sliced

1        tablespoon unsalted butter, cut into 6 to 8 pieces and chilled

Fresh or bottled yuzu juice (or Meyer lemon juice), to taste (optional)

Chopped dill, for serving (optional)

Shichimi togarashi (Japanese seven-spice powder), for serving

Freshly cooked rice, for serving


PREPARATION


1.    Make the miso sauce: In a small bowl, whisk together the miso, sake and mirin; set aside.

2.    Prepare the salmon: Sprinkle the salt on both sides of the salmon. Set aside for 15 to 30 minutes, then pat dry using paper towels.

3.    Arrange the daikon slices in an even layer to cover the bottom of a large donabe or Dutch oven. Add the dashi, cover with a lid and set over medium-high heat.

4.    As soon as the dashi starts to boil, add the enoki mushrooms and carrot in layers. Add the salmon pieces, then pour the miso sauce over the salmon. Sprinkle the garlic on top, followed by the butter.

5.    Cover with the lid again, turn down the heat to maintain a simmer, and cook for about 4 minutes, until the salmon is cooked through.

6.    Drizzle the yuzu juice over the salmon, if using. Divide among individual bowls and garnish with chopped dill (if using) and shichimi togarashi. Serve with rice.

 

Wednesday, January 25, 2023

Braised Pork Shank


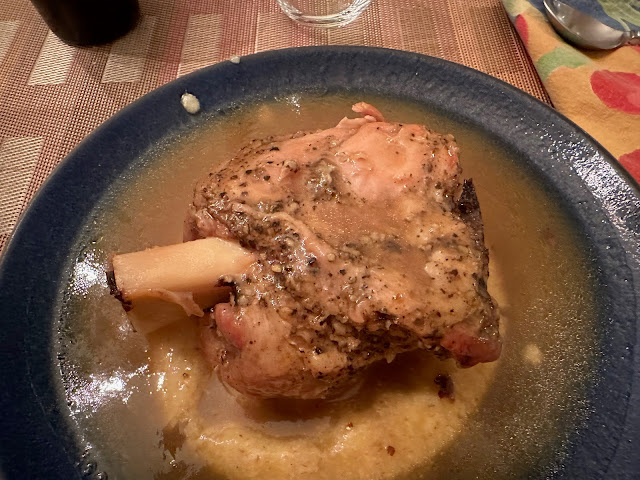
We had purchased and frozen Braised Pork Shanks from Nueske's. They were just sitting in our freezer. There was nothing to do, just open then and warm them up. We served them over Polenta. We will buy some more and keep them on hand. They were meaty and delicious.

Monday, January 23, 2023

Pasta With Cauliflower, Bacon and Sage and Roasted Apples


Pasta With Cauliflower, Bacon and Sage is a fantastic pasta dish. We love Cauliflower and Bacon is my favorite seasoning. We highly recommend this hearty dish.

Since there were great Apples available, we make Roasted Apples for desert. This is a wonderful dessert, best served warm. You can get the recipe on our blog of: January 10, 2007. Click the date to get the recipe.

Pasta With Cauliflower, Bacon and Sage


A comforting dinner for a cold night, this hearty pasta has all the makings of a crowd-pleaser like fried sage leaves, crispy bacon and nutty roasted cauliflower. This recipe demonstrates the magic of starchy pasta water: Swirled with lemon juice and Parmesan, it creates a luxurious sauce without the addition of cream or butter. Add more pasta water than you think you need, so the pasta stays moist as it absorbs the sauce.


Ingredients


1           medium head cauliflower (2 to 2 1/2 pounds), cored and cut into 3/4-inch florets

2 to 3    tablespoons olive oil, plus more as needed

Kosher salt and black pepper

½          pound thick-cut bacon, diced

1           packed cup fresh sage leaves

1           pound short pasta, such as gemelli, casarecce or penne

Zest and juice of one 1 lemon, separated

½          cup grated Parmesan cheese, plus more for serving


Preparation


1.    Heat the oven to 425 degrees. Place the cauliflower on a sheet pan. Drizzle with 2 to 3 tablespoons olive oil, sprinkle with 3/4 teaspoon salt and 1/2 teaspoon pepper, and toss to coat. Roast, tossing occasionally, until tender and browned all over, 20 to 25 minutes. While the cauliflower roasts, bring a large pot of water to a boil.

2.    Heat a large (12-inch) skillet over medium-high. Add the bacon and cook, stirring occasionally, until crisp, 5 to 7 minutes. Using a slotted spoon, transfer the bacon to a paper towel-lined plate. Add the sage leaves to pan and fry until they begin to brown, 1 to 2 minutes. Using a slotted spoon, transfer the sage leaves to the plate with the bacon. Drain all but 3 tablespoons of fat from the skillet (or add additional olive oil, if needed) and remove from heat.

3.    Add 1 tablespoon salt to the boiling water and cook the pasta until just al dente, reserving 1 1/2 cups of the pasta water. Drain the pasta and add to the reserved skillet; heat over low. Pour or squeeze the lemon juice over the pasta, along with 1 cup pasta water and the 1/2 cup grated Parmesan. Toss until the sauce comes together.

4.    Stir in the cauliflower, bacon and sage, adding a splash more pasta water if the pasta seems dry. Season with salt and pepper. Sprinkle with lemon zest, and serve with extra Parmesan on the side.

Saturday, January 21, 2023

Steak with Spinach Pasta


What is more 1960's Retro Steak House than a Steak served creamed SpinachWe don't usually grill steak now but rather first char one side at high heat in a cast-iron skillet then transfer to a very hot oven. It works perfectly. You can get the Steak recipe on our blog of: Feb 17, 2018. Click the date to get the recipe. This time we added this great recipe for One-Pot Creamy Pasta and Greens. Even though it has Pasta it is a wonderful side for the Steak. Try it, guaranteed you will like it!


One-Pot Creamy Pasta and Greens

New York Times


In this recipe, frozen spinach, pasta and a whole lot of milk come together to create a satisfying pasta dish that will remind you of the best creamed spinach you’ve ever had. Stir the mixture often and vigorously to help the pasta release its starch and create a rich sauce. The lemon peel provides a bright citrus flavor, but you can leave it out. If you’d like a spicy version, add a dash of red-pepper flakes along with the shallot and garlic. You can also substitute different greens: Instead of frozen spinach, you can use 2 cups of chopped dark leafy greens, like chard or kale.


INGREDIENTS

Yield: 4 servings


2       tablespoons unsalted butter

3       arlic cloves, finely chopped

1       shallot, finely chopped

Kosher salt and black pepper

5       cups whole milk, plus more as needed

10     ounces frozen chopped spinach

2       wide lemon peel strips

10     ounces ditalini, orzo or pearl couscous

½      cup finely grated Parmesan, plus more for serving


PREPARATION


1.            In a large pot or Dutch oven, melt the butter over medium heat. Add the garlic and shallot, season with salt and pepper, and cook, stirring, until softened, 2 to 4 minutes.

2.            Add the 5 cups milk, spinach, lemon peel and 2 teaspoons salt. Cook, stirring occasionally and breaking up the frozen spinach with your spoon, until the spinach is softened and the milk is just simmering, 5 to 10 minutes.

3.            Add the pasta and cook, stirring often and vigorously, until the pasta is al dente, 20 to 25 minutes, adjusting the heat as needed to maintain a gentle simmer. If it looks dry at any point, add more milk. The mixture will continue to thicken as it sits, so it’s OK if the sauce looks a little soupy.

4.            Once the pasta is cooked, turn off the heat, discard the lemon peels, and stir in the Parmesan until melted. Season to taste with salt and pepper, and serve with more Parmesan.

Thursday, January 19, 2023

No-kneed Bread


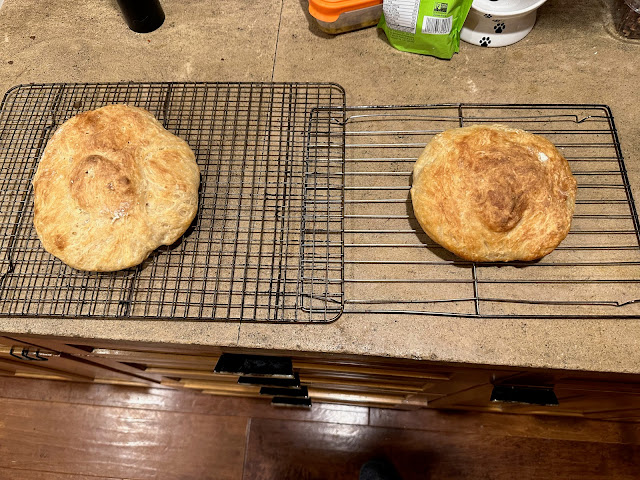
Doshi sent me this recipe for no-kneed bread. I tried it and it was good. The recipe made two small loves. I used only White Flour. Next time I am going to modify it by: making one larger loaf and using 25% Whole Wheat Flour. We will see how that works.

My Mother's Best, No-Knead Peasant Bread Recipe | Alexandra's Kitchen


For more details - Link at: https://alexandracooks.com/2012/11/07/my-mothers-peasant-bread-the-best-easiest-bread-you-will-ever-make


The bowls: The cheapest, most widely available 1-qt bowl is the Pyrex 322. The loaves will not be the same shape, but they will be delicious nonetheless.


I have made the bread with active dry, rapid rise, and instant yeast, and all varieties work. The beauty of instant yeast is that there is no need to “proof” it — you can add the yeast directly to the flour. I never use active-dry yeast anymore.


If you have active-dry yeast on hand and want to use it, here’s how: In a small mixing bowl, dissolve the sugar into the water. Sprinkle the yeast over top. There is no need to stir it up. Let it stand for about 10 to 15 minutes or until the mixture is foamy and/or bubbling just a bit — this step will ensure that the yeast is active. Meanwhile, in a large bowl, whisk together the flour and salt. When the yeast-water-sugar mixture is foamy, stir it up, and add it to the flour bowl. Mix until the flour is absorbed.


Also, you can use as many as 3 cups of whole wheat flour, but the texture changes considerably. I suggest trying with all all-purpose or bread flour to start and once you get the hang of it, start trying various combinations of whole wheat flour and/or other flours.


The single most important step you can take to make this bread truly foolproof is to invest in a digital scale. This one costs under $10. If you are not measuring by weight, do this: scoop flour into the measuring cup using a separate spoon or measuring cup; level off with a knife. The flour should be below the rim of the measuring cup.


Here’s a printable version of this recipes that’s less wordy: Peasant Bread Recipe, Simplified 


How to Bake the Peasant Bread in a Dutch Oven: Preheat a Dutch Oven for 45 minutes at 450ºF. Dust a clean work surface with flour. After the first rise, turn the dough out onto the floured surface and shape it into a ball: I like to fold it envelope style from top to bottom, then side to side; then I flip it over and use the pinkie edges of my hands to pinch the dough underneath and create some tension. Transfer the dough to a sheet of parchment paper. Let rest for 20 minutes. If you feel your dough is spreading too much you can lift up the sheet of parchment paper, dough and all, and place it in a bowl of a similar size. After the 20 minutes, transfer the dough, parchment paper and all to the Dutch oven. Carefully cover it. Bake 30 minutes. Uncover. Bake 15 minutes more.


To bake the peasant bread in a loaf pan: If you are using an 8.5×4.5-inch loaf pan or a 9×5-inch loaf pan, you can bake 3/4 of the dough in it; bake off the rest of the dough in ramekins or other small vessels … the mini loaves are so cute. You can also make 1.5x the recipe, and bake the bread in 2 loaf pans. If you have a large loaf pan, such as a 10×6-inch loaf pan, you can bake off the entire batch of dough in it. For loaf pans, bake at 375ºF for 45 minutes. 


Punch the dough down twice before transferring it to the buttered Pyrex bowls. In other words, let it rise for 1-1.5 hours, punch it down, let it rise again for about an hour, punch it down, then transfer it to the buttered bowls.


Tuesday, January 17, 2023

Harissa-Spiced Chicken and Rice with Dates & Pistachios


We made Harissa-Spiced Chicken and Rice with Dates & Pistachios a Moroccan influenced dish. It was excellent. We love all things Moroccan.


Harissa-Spiced Chicken and Rice with Dates & Pistachios


This one-pot chicken and rice with dates, harissa, and pistachios is a showstopper — it’s a mix of sweet and spicy, smoky and crunchy, and best of all it couldn’t be simpler to prepare. There’s no need to brown the chicken. In just about 45 minutes, it will be done! The subtle freshness or orange zest permeates the rice and the chopped dates add a nice sweetness. This is a great one for entertaining, but its minimal demands make it great for any night of the week.


A little over three years ago, I took a class at a local restaurant, Tara Kitchen, which sent me on a Moroccan-cooking bender: I stocked my pantry with ras-el-hanout and harissa, made a batch (two actually) of preserved lemons, then used them to make a tagine with chicken, green olives, and raisins.

I had known little about Moroccan cooking before taking the class, and I still know little, but everything I seem to make with Moroccan seasonings, I tend to love: see Leblebi (North African Chickpea Stew) and now this one-pot chicken and rice with dates, harissa, and pistachios.

It’s a mix of sweet and spicy, smoky and crunchy, and best of all it couldn’t be simpler to prepare. It comes from Diana Henry’s Simple. 

Note: You’ll need harissa, a spicy prepared paste/sauce, which is not hard to find these days. If you’re up for making it from scratch, this is a great recipe: Homemade Harissa. Or you can use jarred. I like Tara Kitchen’s brand, which is now available at Whole Foods Market (not everywhere, see locations here).


Adapted From Diana Henry’s Simple.

I have made the recipe somewhat more fussy: the original recipe truly calls for throwing everything in the pot, sticking it in the oven, and baking it. I didn’t love the taste of the raw onion, so I added one more step, which is to sauté the onions for 5 minutes, then add the remaining ingredients one after the other.

I prefer toasting whole cumin seeds then grinding them in my mortar and pestle. Do this if you prefer as well. I also don’t love ground ginger, so I used a teaspoon of coriander seeds (not similar, but works here), which I also toasted and ground.

Harissa is spicy prepared Moroccan sauce/paste. It varies in heat level, so you may have to adjust to taste. I found the 1.5 tablespoons called for in the original recipe not spicy enough for me; 4 tablespoons is quite spicy, however.

Original recipe calls for 12 dates. I prefer fewer, but use as many as you wish.

Brown rice: several commenters tried unsuccessfully to use brown rice. It’s possible that a larger amount of water could help the brown rice cook properly, but I’ve never tried, so I can’t say for sure. I would look to the package instructions for guidance re water and time.


INGREDIENTS


3             tablespoons olive oil, divided

1             onion, finely chopped

Kosher salt and pepper to taste

8             pieces bone-in, skin-on thighs and/or drumsticks

2 to 4     tablespoons harissa

3             cloves garlic, minced

1             tablespoon ground cumin or whole cumin seeds (see notes above)

1             teaspoon ground coriander (see notes above)

1             cup basmati rice, rinsed until water runs clear, do not use brown rice, see notes above

1             bay leaf

6             medjool dates, diced (see notes above)

1             orange

2             tablespoons (or more) chopped pistachios (I use roasted unsalted)


INSTRUCTIONS


1.            Preheat the oven to 400ºF. In a large skillet over high heat, heat 2 tablespoons of the oil until it shimmers. Add the onions and reduce the heat to medium. Add a pinch of salt, and sauté until the onions are soft and translucent, about 5 minutes.

2.            Meanwhile, place the chicken in a large bowl. Season all over with salt and pepper. Pour in the remaining tablespoon of oil and 1 to 2 tablespoons of harissa, depending on your heat tolerance. Toss to coat.

3.            Add the garlic to the onions, and cook for another minute more. Add the spices and 1 to 2 tablespoons of the harissa (depending again on your heat tolerance). Stir to coat the onions in the seasonings. Add the rice and stir for another minute or until each grain is glistening. Add the dates and zest the orange right into the pan. Halve the orange and squeeze the juice right into the pan. Add 1/2 teaspoon salt to the pan. Stir to combine. Nestle the chicken over the top of the rice. Pour 1 and 1/3 cups water (see notes above re water) all around. Nestle in the bay leaf.

4.            Transfer pan to the oven (uncovered) and cook for 40 minutes. Remove pan from oven. Scatter pistachios over top. Serve immediately.

Monday, January 16, 2023

Bacon-Roasted Pork Tenderloin with Caraway Cabbage and Apples


Bacon-Roasted Pork Tenderloin with Caraway Cabbage and Apples is a perfect winter dish. Pork Loin, Bacon, Cabbage - what could be better on a cold winter evening? It transports me back to dinners we had in Berlin (at least in my imagination). The dish requires a lot of Toothpicks to attach the bacon to the loin, be sure to remove them all before serving. It makes a lot and gives great leftovers. As I write this I can actually recreate the aroma of the dish in mind! You can get the recipe for the hearty dish in our blog of: October 29, 2018. Click the date to get the recipe.

Sunday, January 15, 2023

Panettone French Toast


Every year we order Panettone at Xmas time. We often have more than we can eat. We found a recipe for Panettone  French Toast. Never would have thought to make it with Panettone. It is super rich and good. Making Panettone French Toast is from now on a Holiday Tradition in our house!
 

panettone french toast

David Lebovitz


2       large eggs

6       tablespoons whole milk

¼      teaspoon vanilla extract

1/8    teaspoon ground cinnamon

pinch salt

4       slices panettone, about 1 1/4-inch (4cm) thick)

butter, for frying the French toast


1.    In a wide, shallow bowl, beat the eggs, milk, vanilla, cinnamon, and salt together with a fork until well-combined. Place the slices of bread in the custard and gently press them down to help the bread absorb the custard, then turn them over the do the same to the other side of the bread. 

2.     Heat a good-sized pat of butter in a large skillet over medium heat. Add the custard-soaked slices of bread to the pan and cook until they're browned on the bottom, about a minute. Turn the slices of bread over and fry on the other side until browned on the bottom. 


Friday, January 13, 2023

Risotto with Pork Sausage


One of our favorite winter dishes is Sausage Risotto. We always make this recipe Risotto con Luganegh Risotto with Pork Sausage from The Cuisine of Venice & Surrounding Northern Regions by Guisti-Lanham Dodi. You can get the recipe from our blog of: April 21, 2009. Click the date to get the recipe. I didn't think that the recipe could be improved upon, however this time Cathy doubled the amount of Mushrooms! It was even better than usual!

Wednesday, January 11, 2023

Stir-Fried Green Beans With Pork and Chiles


Stir-Fried Green Beans With Pork and Chiles is a favorite of ours, we make it often. The key is to purchase really good fatty Pork! Highly recommend this dish if for some reason you haven't made it yet! You can find the recipe on our blog of: Feb. 9, 2018. Click the date to get the recipe.

Tuesday, January 10, 2023

French Onion Soup


Name a better meal on a cold winter day than Julia Child's French Onion Soup. Bet you can't. You can get the recipe for ours on our blog of: December 21, 2008. Click the date to get the recipe.

Saturday, January 07, 2023

Shrimp with Hot Fennel Sausage and Polenta


Shrimp with Hot Fennel Sausage and Polenta is a favorite of ours. Who would think that Shrimp and Hot Fennel Sausage would make such a great combination? You can find the recipe on our blog of February 7, 2019. Click the date to get the recipe. We started with a Salad of Dates and Parmesan Cheese.

Wednesday, January 04, 2023

One-Pot Braised Pork Ragù


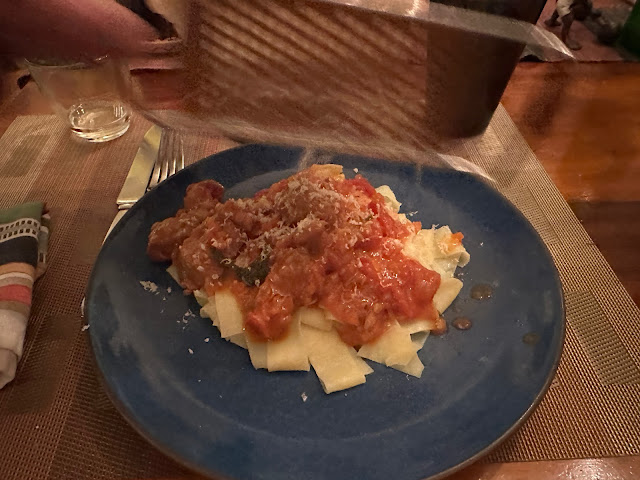
We absolutely loved the One-Pot Braised Pork Ragù recipe. It was delicious and actually better in our opinion than the one we usually make with Veal. Try this recipe! We started with a Cauliflower SoupThe soup was so Creamy you would swear there was a ton of Cream in it. There is none! It is a rich delicious soup. You can get our recipe on our blog of: January 17, 2022.


One-Pot Braised Pork Ragù


New York Times


This vegetable-heavy baked ragù is a great way to stretch one pound of meat into a hearty pasta sauce. There’s only about 15 minutes of active work; the oven does the rest. Pork shoulder (also known as picnic shoulder) is a relatively inexpensive cut of pork that takes well to braising, which yields super flavorful and tender meat. Cubing it into small pieces helps it soften faster, while a little heavy cream helps tenderize the meat as it cooks. The versatile ragù can be served over pasta or polenta, and leftovers easily turn into craveable sandwiches the next day. The recipe is easily doubled and freezes extremely well, if you’d like to cook once and eat twice.


INGREDIENTS

Yield: 4 servings


¼      cup extra-virgin olive oil

2       pound pork shoulder, cut into ½-inch cubes

Kosher salt (such as Diamond Crystal) and black pepper

3       medium carrots, peeled and finely chopped (1½ cups)

1       medium yellow onion, diced into small pieces (1½ cups)

5       garlic cloves, minced

2       tablespoons tomato paste

1       (28-ounce) can whole tomatoes

1       fresh rosemary sprig

2       fresh basil sprigs, plus chopped leaves for garnish

¼      cup heavy cream

Cooked pasta or polenta, for serving

Freshly grated Parmigiano-Reggiano, for serving


PREPARATION

1.            Heat oven to 450 degrees.

2.            In a large Dutch oven, heat 2 tablespoons of the oil over medium. Add half of the pork to the pot and season with salt and pepper. Cook, stirring occasionally, until browned, 3 minutes; using a slotted spoon or tongs, transfer the pork to a plate. Repeat with the remaining pork and season with salt and pepper.

3.            Reduce heat to medium-low and add carrots, onions and 1 tablespoon of the oil. Season with salt and pepper, and cook, stirring occasionally, until onion is softened, about 3 minutes. Stir in garlic, then add tomato paste and the remaining 1 tablespoon oil, and cook, stirring continuously, until lightly caramelized, 3 minutes.

4.            Add pork and any accumulated juices, then the tomatoes and their juices, crushing the tomatoes with your hands as you add them. Stir in the rosemary, basil sprigs, cream and 2 cups of water; season with salt and pepper. Bring to a boil over high, cover and bake until pork is tender and sauce is thickened, about 1 hour 15 minutes. Discard rosemary and basil sprigs.

5.            Serve pork ragù over pasta or polenta. Top with some cheese and chopped basil.